

A successful family photoshoot relies on thoughtful planning – especially on your part as the photographer. Make sure you choose a location that holds special meaning or offers a beautiful backdrop that suits the family, such as:
- A park
- A beach
- Their own garden
- In front of their family home
Coordinating wardrobes in complementary or similar colours is also a good idea, as it creates a more cohesive and unified look; avoid outfits that are overly matching or clashing. When shooting outside, you also need to be aware of the weather and the time. Aim to photograph during the golden hour as this provides soft and flattering natural light for your photos.
For authentic and joyful family portraits, you should strive to make everyone, especially children, feel at ease. Encourage comfort by keeping the atmosphere light and fun to capture true smiles and relaxed postures in your pictures. While keeping ideal lighting in mind, don’t be afraid to take breaks if needed.
Try Our Top Family Photo Poses
Not everyone feels instantly at home or at ease in front of a camera. This can create a challenge for you as a family photographer, as you need to be able to guide your subjects. Posing can be difficult, but with the right guidance and a positive atmosphere, you can help all family members pose naturally and comfortably for their family portrait.
The Classic Group Pose
The classic group pose is a timeless choice for family portraits. In this setup, family members stand or sit closely together, all facing the camera. The pose highlights family unity and connection, making for a memorable photo.
To achieve the best results, focus on symmetry and balance. Position taller family members at the back and centre while ensuring everyone’s faces are clearly visible. Remember to encourage the family to relax their shoulders and smile naturally for a warm and inviting portrait that is as traditional as it is intimate.
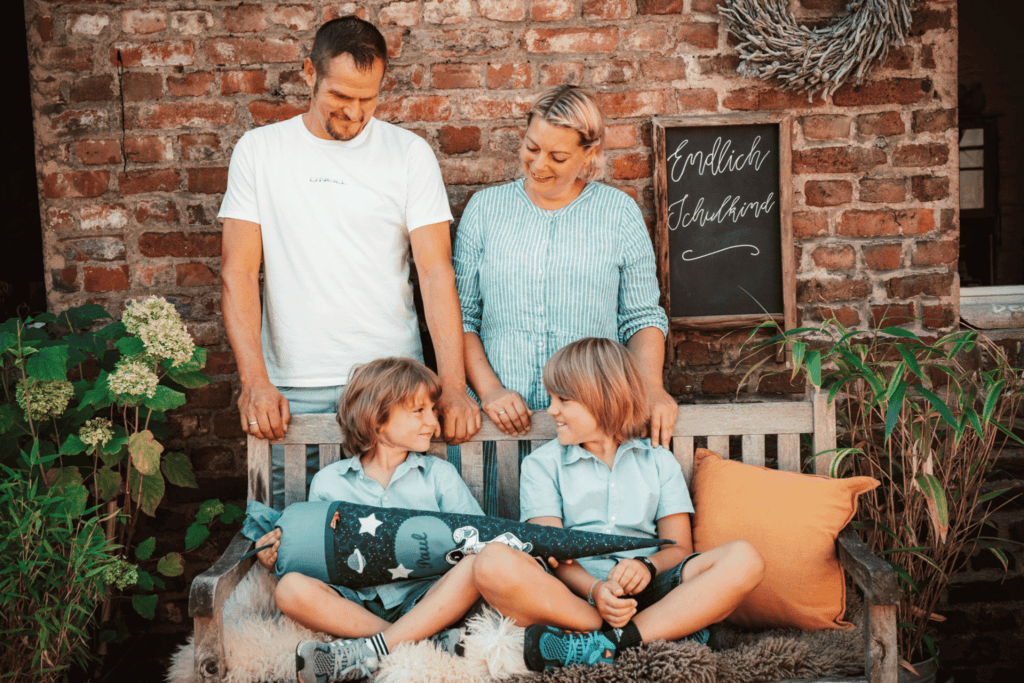
Image: Julia Buck
The Candid Interaction Pose
For a more dynamic and lively family portrait, you can experiment with candid interaction poses. These types of images showcase family members engaging naturally – laughing, playing, or walking together.
To create these memories, use prompts that encourage interactions, such as asking family members to share a joke or play a game. Make sure to shoot continuously, as this allows you to capture spontaneous and genuine expressions and connections. This way, you will end up with photos that feel authentic and full of life.

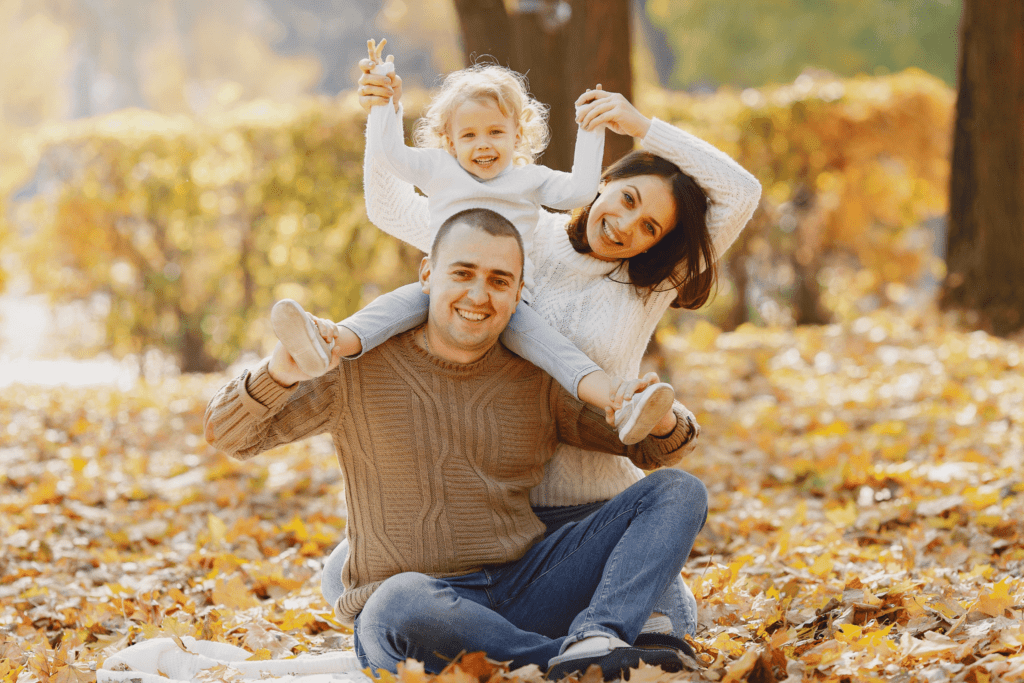
The Triangle Pose
Photographing families is all about capturing that feeling of love in a visually pleasing way. For that, the triangle pose is a popular choice. This pose creates a balanced and visually appealing composition. In this arrangement, parents are usually positioned with their children in the middle – whether to the side or behind the kids. This forms a triangular shape that not only draws attention to each family member but also creates a sense of harmony and structure. This is a great pose for any family, making it a must-try, no matter whether you are doing a small or large family photo session.

Seasonal Poses
When possible, incorporating seasonal elements into a family photo adds a unique and timely touch. For autumn family portraits, consider using leaves, pumpkins, or a warm, earthy colour palette. In winter, try to pose in the middle of a snow-covered landscape or cuddled up under a big, cosy blanket on the sofa. During summer, visit the beach or a lake and take advantage of the brighter evenings and how the light reflects on the water.Using natural surroundings as props can help enhance the seasonal theme. Encourage the family to interact with the props or use them as a natural way to get the conversation flowing for those natural laughs and smiles. The best part is that you can experiment and let the family play around, such as by throwing colourful leaves into the air, building a snowman, or running along the shoreline. A Christmas mini-session might also be an ideal way to capture the holiday spirit in a candid way.
When doing a family photo session, whether big or small, you will almost always have children as part of the picture. Children are a bit different to work with compared with adults, and this requires a different set of skills in order to get the best photos.
Our top tip for making children more comfortable during a shoot is to keep it fun. You can try to incorporate games or props that encourage the children to play and thereby smile. Playful activities, such as blowing bubbles, tossing a ball, or holding a favourite toy, can help keep their attention while adding a childlike sense of warmth and innocence to the pictures.
If the family has requested a specific type of pose, such as the triangle pose or everyone sitting on the stairs in front of the house, you will need a different approach to keep the kids engaged. When advising everyone on what to do, remember to keep the instructions simple for younger family members. By sticking to simple poses, they will be able to move more naturally and, by extension, more comfortably.
Finally, pay attention to the children. Each child is unique, and a good photographer can reflect this individuality in a family photo. You can encourage the children to be themselves – whether shy, playful, or curious – and allow them to express their personality. This will result in pictures that are not only stunning but also reflect who everyone in the family truly is.

Image: Julia Buck